
In the previous tutorial we concentrated on platform-based actors for the simple platform game, but if you wanted to make a top-down game you’d likely want to use 8 or 4 directional movement types.
You can download the Tutorial2 starter assets from https://mixelslab.com/scorpion as before. You’ll see a bunch of food PNGs, and a level in there. Unlike last time we’re not going to be doing everything from scratch in this project, as it would be silly explaining the same things repeatedly. This time with the beginnings of this simple project downloadable above – ideally you’ll have picked up the basics already (either available in Zzap back-issues or my site mentioned above). Downloading the Tutorial2 Assets alone is enough to get tinkering and hopefully learn some things! This time I’ll also be putting the project files on Github and you’ll be able to follow along with the development as this becomes a complete, silly little game – more on that in part 2!
When you open the project you’ll see the familiar project tab with the game’s palette etc.

So, the player will be this little rat guy. He’s going to be wandering around a kitchen trying to collect all the cheese.

In the animation tab you’ll see walk animations for left, up and down (There’s no need for a right facing one as we’ll have auto-flip enabled). Let’s make an actor for him over in the Actors Tab!
To do that you’ll press the + button in the top left, choose a rat animation, and save the new actor as p1rat.actor into the actor’s folder. To the top right of the preview window you’ll see the options below:
And choose “Control: Eight Directional Movement”
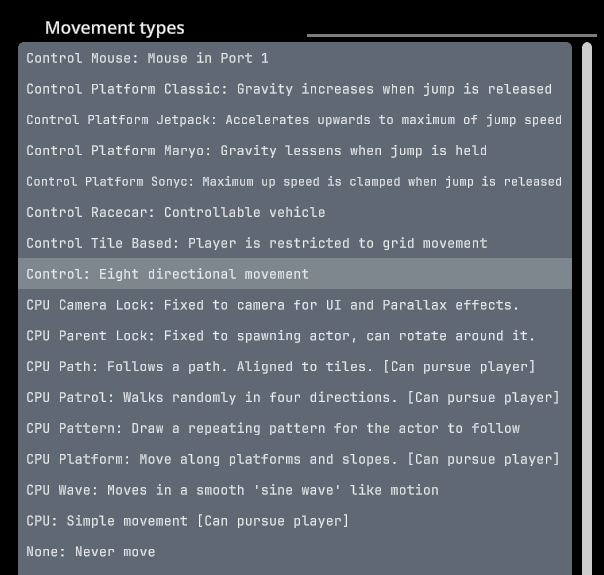
There’s a lot of options here. Notably “CPU Race Car” is a new type of player actor that Erik mentioned in his column, suitable for some top down racing games. “Platform Jetpack” is also really handy if you’re making a game (like Jetpac!) where you can fly upward instead of jumping, but still walk on platforms. Anyway, here – we’re using eight directional movement. If you were making a grid based map with 4 directional movement (like some old JRPGs) you might choose “Control Tile Based” instead.
For the speed and Acceleration I set Left, Right, Up and Down to 1. And all 4 acceleration values to 0.2
Now lets place the player on the map, which is already included as “Kitchen.tmx” in the levels folder. Go into the Maps tab and at the left select “Kitchen” then over at the far right press “Edit Map” – that will load the map in Tiled and you’ll be able to place the player actor on the map somewhere (I’ve put him on the “actors” layer, after selecting him from the actors palette on the right).

Here is the rat placed in Tiled. (please note I’ll be updating graphical assets so by time of print things will probably look less sketchy, haha!)
In Scorpion’s Code tab you’ll see, among some others, the startup.codeblock – that just has two simple lines currently. “Level Kitchen” (Accessed from the Level category) and CameraPosition (from the Display category). That’s enough to load the level and have the camera following the player.
If you press F5/Run in WinUAE now you’ll have a cute little rat running around on the table, controllable by joystick 1.
Next time we’ll add collectables and enemies, as well as trying the new floating panel system, but if you want to continue testing things, how about going into the Blocks tab and creating blocks from some of the graphics in the Animations folder? You could use some of them as solid walls.. Maybe even use the food as collectables?
Thats all for now, happy experimenting!
Hurry up with 2 you little tease! 🙂